Folds
Folds allow you to show entire sections of your document as a single line. This is useful when you want to hide the parts of the document you're not interested at the moment and be able to focus on its overall structure.
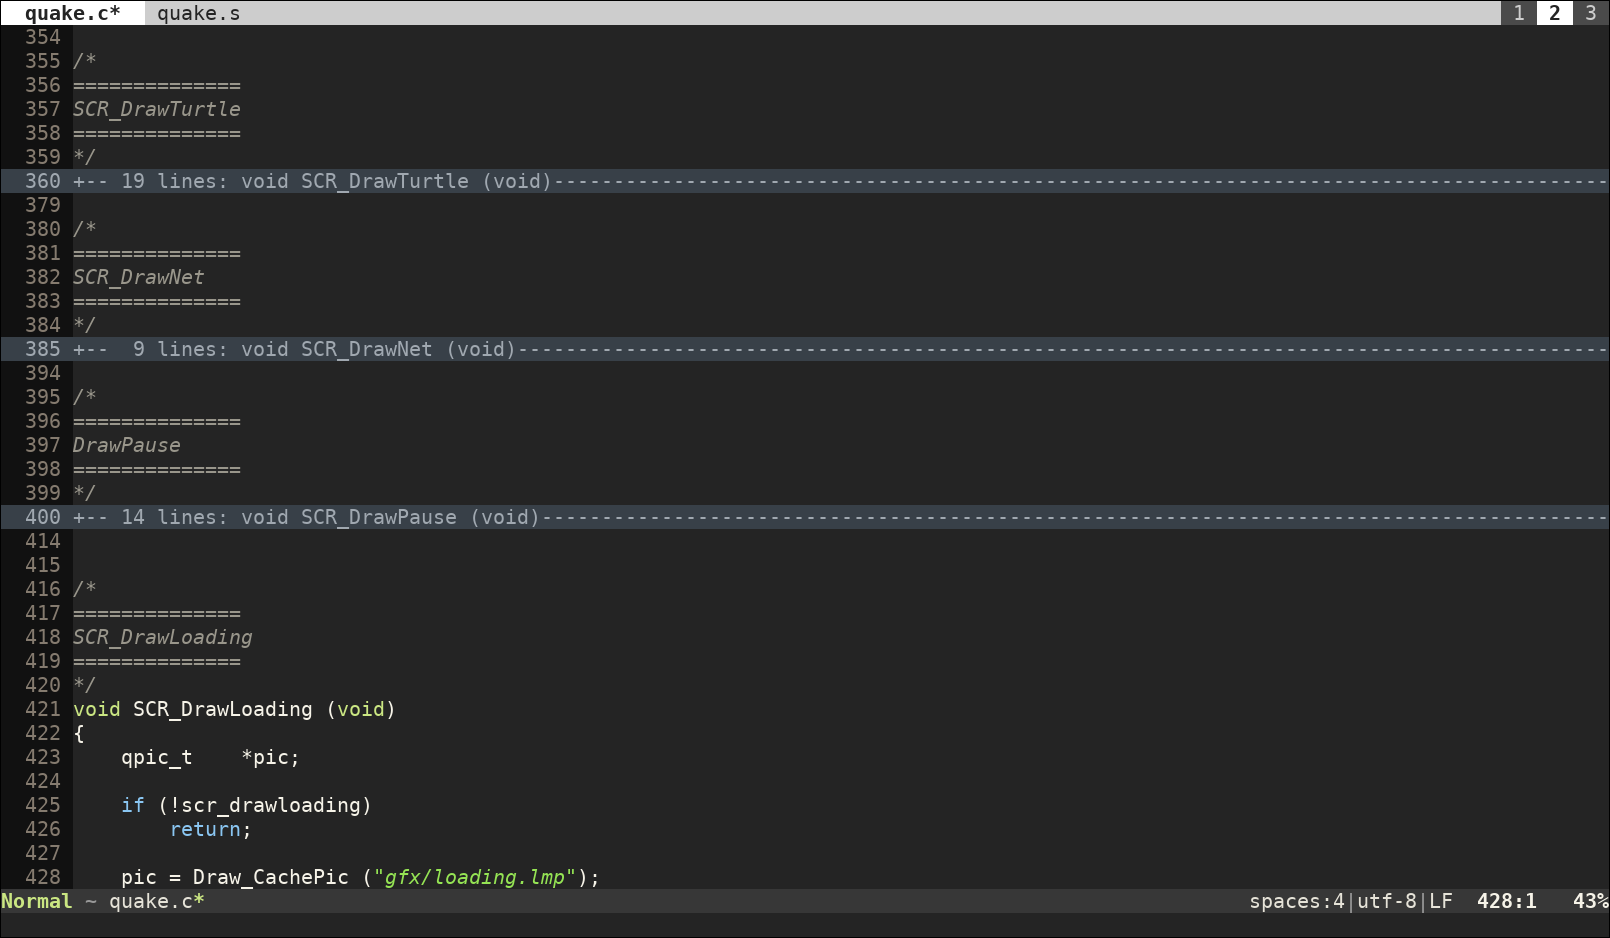
In the following image, three sections of the code have been folded:
Use the following key commands to manage folds:
- b f:
(in visual mode) create fold. Select the area to fold and press b f to fold it into a single line.
- b a:
toggle the fold open/closed. Once the fold is created, you can open or close it to see its contents at any time. When a fold is open you can create nested folds inside it (again with b f).
- b d:
delete the fold. Use it on top of the folded line or anywhere inside an open fold.
- b i:
toggle folding on/off. This allows you to display the entire document or to show the folds again without changing their current state.
You can also open/close multiple folds simultaneously depending on their nesting level. For example, you can open all folds in the first level but keep closed inner levels. To control that, Vim offers the foldlevel option. Its value is the number of levels that should be open. A value of 0, closes all folds:
:setlocal foldlevel=0
A value of 1, for example, will keep the first level open.
There are some keyboard commands that can be used to modify foldlevel:
- b M:
close all folds
- b m:
close one more level of folds
- b R:
open all folds
- b r:
open one more level of folds
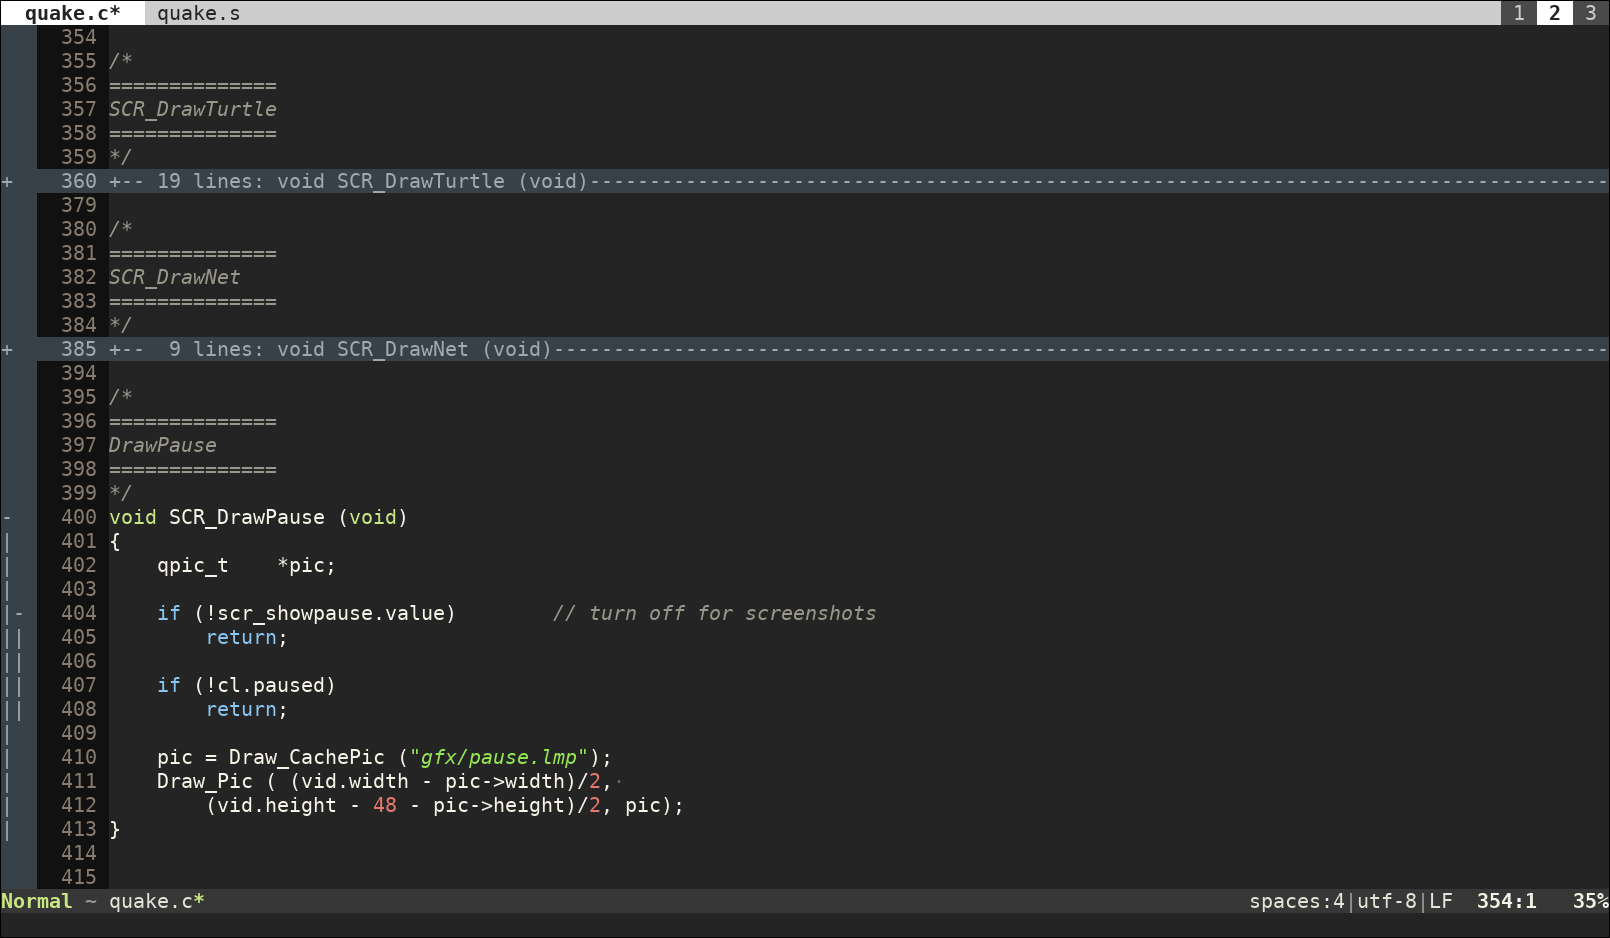
Since it can be difficult to spot where you created folds once they are open (the closed ones are clearly identifiable by their different color highlighting), you can use the command:
:set foldcolumn=3
to display them in a column to the left. The number sets how wide you want this column to be (probably you want it to be wider the more nested folds you have):
Once you leave a file, all the folds that you have created are discarded. If you want to use them again, you can save them with:
:mkview
and restore them with:
:loadview
Automatic folding
By default, folds are created manually. However, they are lost when the file is closed (unless previously saved with :mkview) and creating them may be a bit cumbersome in some cases. That's why you can also have your code automatically folded. To do so, there are two main options:
Having folds defined using indent: this is very practical as it works with any programming language or file type as long as the content is correctly indented.
Having folds defined using the file content's structure (ie. the syntax of the programming language): this method can yield better results as the folds are created based on the content itself. However, it may require that you install an external plugin for your file type.
To enable indent folding, use:
set foldmethod=indent
set foldlevel=0    " have all folds close at the beginning
set foldnestmax=3  " don't have more than 3 fold levels
set foldcolumn=3   " show the folds in a column to the right (3 levels)
You can include these lines (or similar ones) in your .vemrc file if you want to enable indent folding for every single file. If you want to enable it for a particular file type or you want to have different values for different ones, then replace set by setlocal and follow the instructions in Filetype configuration to know where to place these options for your particular type of file.
To enable folding based on the structure of the file content, Vim offers both the syntax and expr folding methods. In the first case, you need a syntax file for your programming language that provides support for folds. In the second, you need the option foldexpr to be set for your particular file type too. For some languages, Vim offers default syntax files with support for folds, but it is not necessarily true for every language. In any case, if you are interested in this kind of folding, you can check if Vim offers support for it in the default syntax file or check out which plugins are available for your programming language or file type. Check the Plugins section to learn how to install them.
Diff mode
When you open two files to compare their differences by using the 'diff' feature, those parts that are common to both of them are automatically folded. This allows you to focus on the parts that show differences.
These folds are normal ones and can be managed with the same keyboard commands described in this section. In particular, for diffs, it is very useful to toggle the folds open and close with ba when you need to inspect their contents.
To know more about comparing files check the Diff Mode section.
More info
Vim has support for more keybindings, fold methods and fold options than the ones described here. To get a comprehensive view of the possibilities, check:
:help usr_28.txt
:help fold.txt
Since these are chapters of the official documentation of Vim, just take into account that Vem uses b instead of Vim's z as the key prefix to manage folds. Other than that, the rest of the information is as valid in Vem as it is in Vim.